Make these crispy air fryer sweet potato wedges in less than 30 minutes. Serve this delicious side dish with your favorite dipping sauce. Read the full article →
Vegan

Need a quick and easy split pea soup recipe for dinner? This is the best split pea soup recipe that can be made in an hour. Read the full article →

It’s easy to make strawberry fruit leather in a dehydrator. This 3-ingredient homemade strawberry fruit leather has no sugar added for a healthy snack. Read the full article →

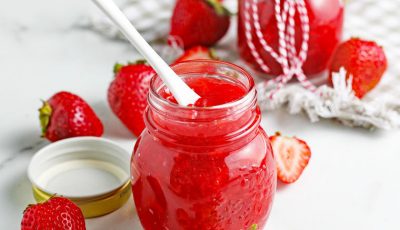
This keto strawberry sauce recipe is quick and easy to make. Try keto strawberry sauce on your favorite low carb dessert or breakfast treat. Read the full article →
Serve this easy vegan garbanzo bean salad for dinner. This easy garbanzo bean salad is made with chickpeas, cucumbers, and more. Read the full article →

Learn how to make homemade applesauce no sugar added. This recipe for homemade applesauce no sugar takes 30 minutes to cook. Read the full article →

This homemade hot chocolate mix is easy to make. This homemade hot chocolate mix recipe can be made vegan or sugar free. Read the full article →

These no-bake homemade peanut butter cups are easy to make. This best copycat Reese's Peanut Butter Cups recipe is gluten free. Read the full article →

Make this Instant Pot vegetable soup with fresh vegetables or frozen. There's nothing like warm Instant Pot veggie soup on a cold night. Read the full article →

Make Instant Pot Sweet Potatoes in 30 minutes. You'll find that cooking sweet potatoes in an Instant Pot comes out perfectly every time. Read the full article →

This vegan caramel sauce recipe is easy to make with simple ingredients. You'll love this creamy 5-ingredient vegan caramel sauce for dessert. Read the full article →

This gluten free apple crisp recipe combines the flavors of baked apples with crispy oatmeal. Can be made as a vegan apple crisp dessert. Read the full article →

Crockpot Apple Cobbler is a simple, 5-ingredient dessert. This slow cooker apple cobbler can be made in a few hours. Read the full article →

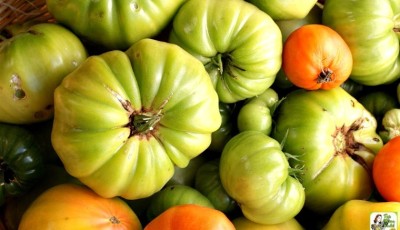
Looking for green tomato recipes? Then make this easy green ketchup recipe! Read the full article →