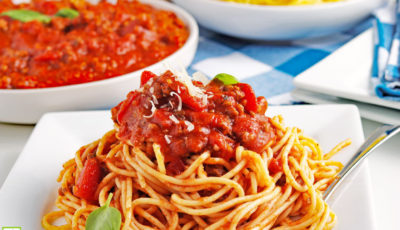
Make this homemade crockpot spaghetti sauce recipe for weeknight dinners. This crockpot spaghetti meat sauce is a family favorite. Read the full article →
Recipes
This fried air fryer ravioli recipe is easy to make. Dip these air fryer toasted ravioli in a marinara sauce as a party appetizer. Read the full article →

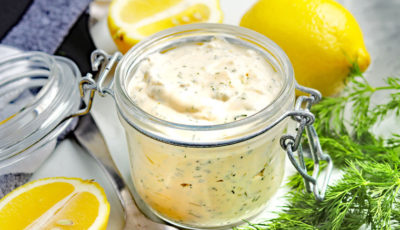
Use this homemade tartar sauce recipe on your favorite seafood dishes. This best tartar sauce can be made in 10 minutes. Read the full article →
This Instant Pot Pulled BBQ Chicken recipe is low-carb and keto-friendly. Serve shredded Instant Pot BBQ chicken in salads or a sandwich. Read the full article →

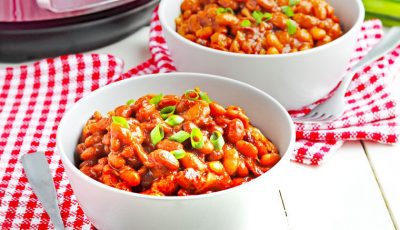
Serve up this easy Instant Pot baked beans recipe at your next cookout. Baked beans in an instant pot are sweet, smoky, and tender. Read the full article →
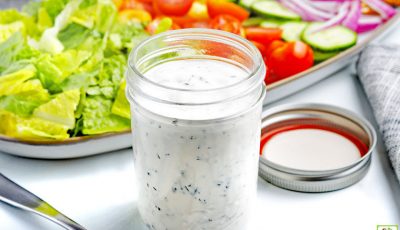
Making this low-carb keto ranch dressing recipe is quick and easy. Use this creamy keto ranch dressing recipe on salads or as a dip. Read the full article →
It’s easy to make strawberry fruit leather in a dehydrator. This 3-ingredient homemade strawberry fruit leather has no sugar added for a healthy snack. Read the full article →

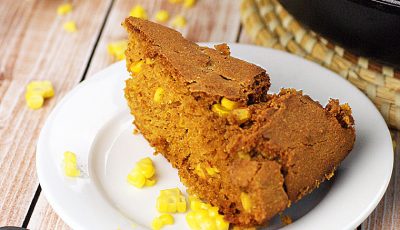
Make this easy gluten free cornbread recipe for your next cookout. This is the best gluten free cornbread recipe made in a skillet. Read the full article →
Make Instant Pot chicken thighs with honey garlic sauce for dinner. Serve this easy Instant Pot chicken thighs recipe with rice and vegetables. Read the full article →

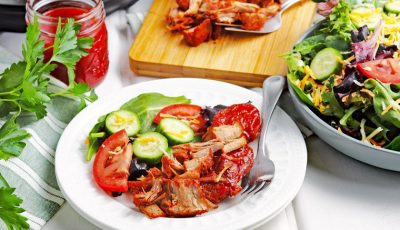
This Instant Pot Country Style Ribs recipe is easy to make. Serve Instant Pot Country Style Ribs with your favorite side dishes. Read the full article →
This is the best Oreo balls recipe for any holiday. You can make this no-bake recipe for Oreo balls gluten free. Read the full article →

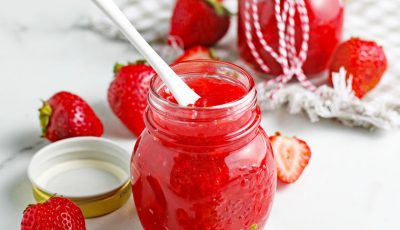
This keto strawberry sauce recipe is quick and easy to make. Try keto strawberry sauce on your favorite low carb dessert or breakfast treat. Read the full article →
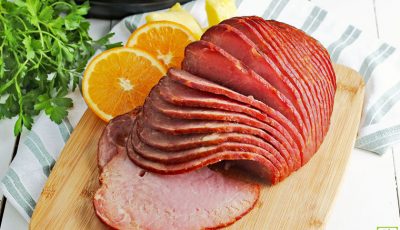
You won’t believe how easy this Instant Pot ham recipe is. All you need is a few ingredients to make a low-carb holiday ham with a sugar-free keto glaze. Read the full article →
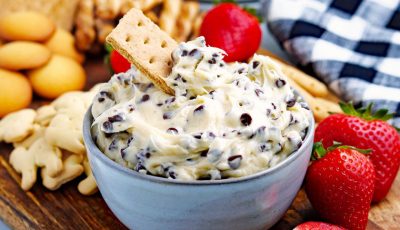
This cookie dough dip takes only 10 minutes to make. Serve up this recipe for chocolate chip cookie dough dip for parties or as a special treat. Read the full article →